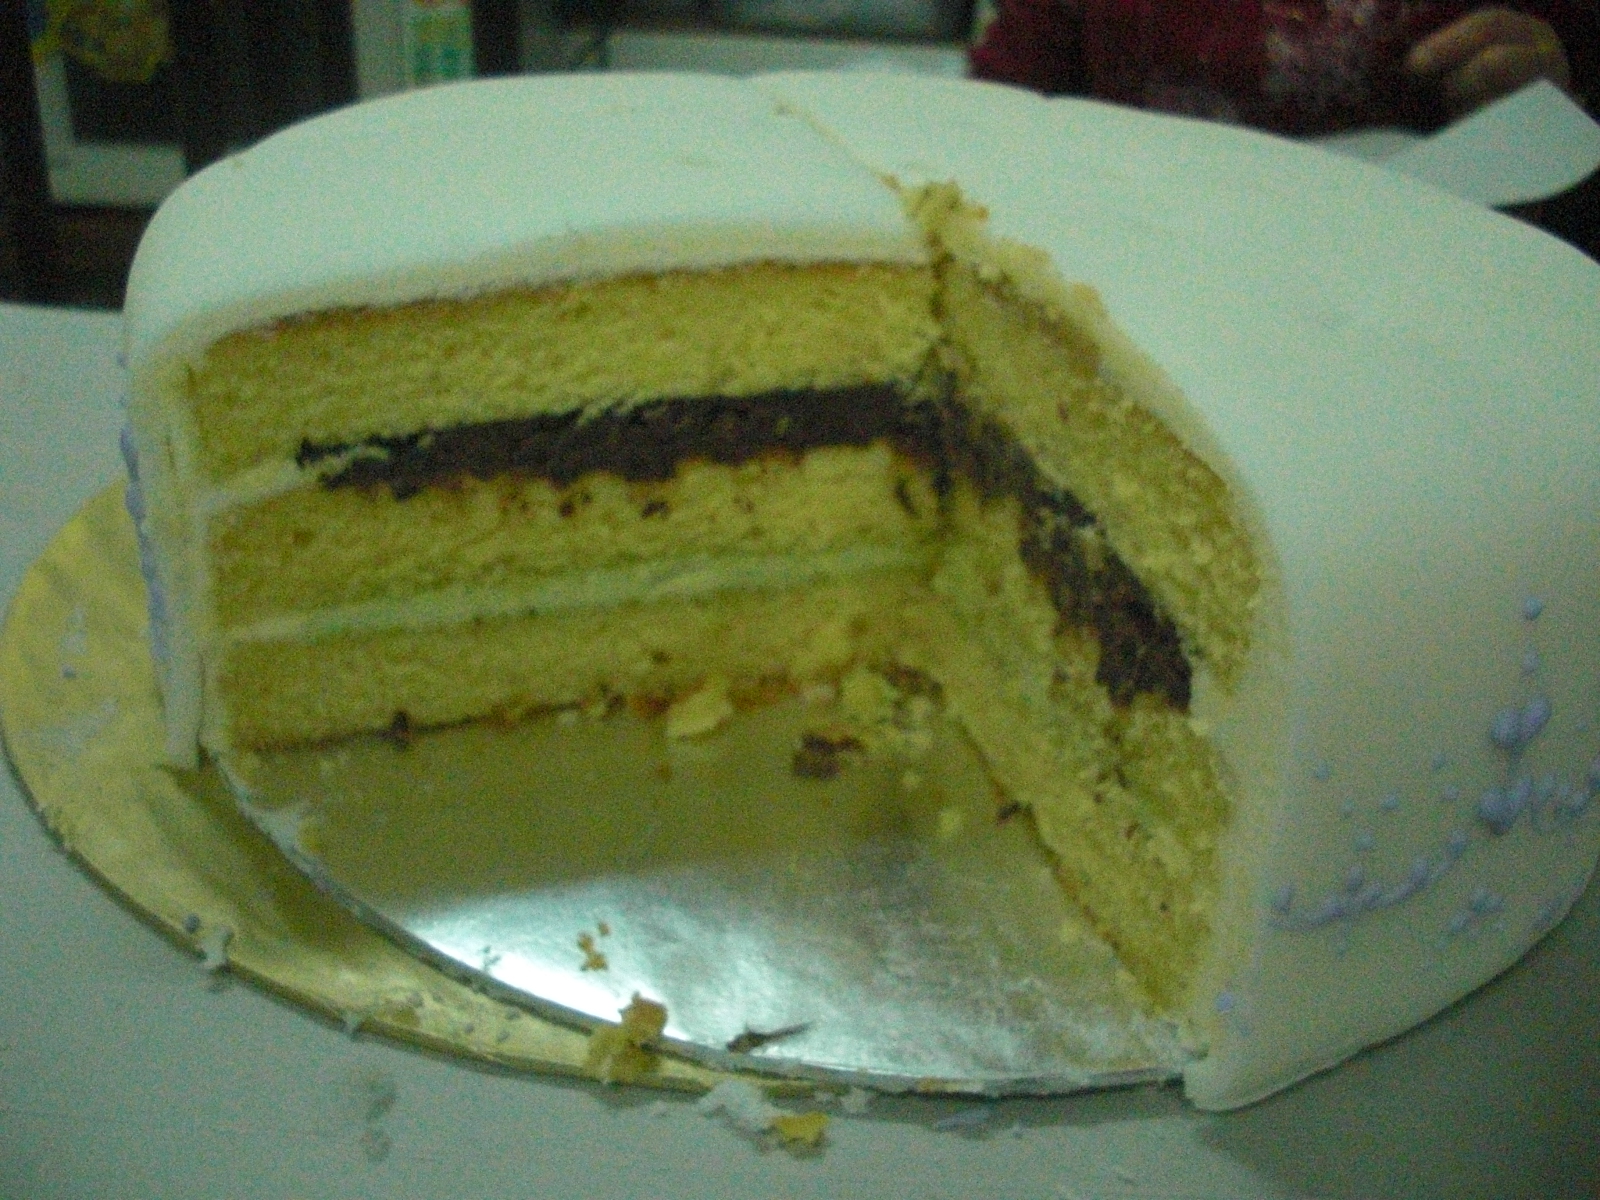
Today I will not be posting new recipes, instead I will post pix of my brother's wedding cake...(^.^). My brother who works in Singapore decided to have a sunset wedding with his wife at his hometown, Kota Kinabalu, Sabah and his wife ( my sis-in-law) requested for me & my USA brother's help to bake their wedding cake. BTW, my USA brother is my youngest brother and not the groom...:-))
I left all the planning to my brother as he has more experience and I just assisted him in the baking. He and my sis-in-law decided on a 3 tier 'satelite' wedding cake design and my sis-in-law requested for green tea flavour. Well, my USA brother flew in on 31st Aug 2011 and the next day we started buying all ingredients to prepare for the wedding cake. Wow! I have never bought so much cake ingredient especially the icing sugar. All in all I bought 30kgs to make the buttercream icing and also the fondant (but we didnt use up all of the sugar).
I baked the butter cake using my favourite recipe. I had to bake 14 pcs of cake to make seven 6" cake , 2 pcs of 8" cake and 3 pcs of 12" cake. I also made lots and lots of fondant. My brother in the mean time, prepared all the fillings which is Lemon Buttercream, Red Bean paste & Green Tea Buttercream.
Oh yes, we were also supposed to make Lollipop Macarons to serve to the guests as pre-dinner snacks. I told my brother that I havent have any success on making macarons and left the job to him...:-)) Initially, he had failures due to the high humidity in our place and after some trouble shooting we managed to get some nice ones & some bad ones.
Here are some of the pix of the wedding cakes...
The butter cake all covered with fondant.
My sis-in-law (the bride) wanted a contemporary design on the cake. Initially, we were supposed to use a stencil but it didnt work out as the icing got smeared so my brother had to use 'free hand' to pipe the design..(I would not have been able to do it...:-)
Tadah!! The completed wedding cake assembled at the wedding dinner reception. (Cakes & fondant made by me, fillings & decoration by my US brother)
My Spore brother & sis-in-law scout around Spore & Johore for a wedding topper but couldnt find one that they like so my USA brother offered to buy for them from USA and they chosed this one..
The 7 pcs of 6" cake which is the bottom 'satelite' tier is sandwiched with lemon buttercream. As there were 7 tables, each table had a whole cake served to them.
The 8" and 12" cake are sandwiched with Red Bean paste and Green Tea buttercream. We divide the 12 " cake amongst family members and the 8" cake was kept frozen for the bride & groom's 1st year anniversary. (The cake is still in my freezer as they couldnt bring it back to Spore (excess luggage) and furthermore they plan to celebrate their 1st anniversary in KK, Sabah. (I have to ensure no 2 legged rat eat them up...:-))
And last but not the least, the Lollipop macaron made by my brother packed nicley for the guests.
Sunday, September 25, 2011
Saturday, September 17, 2011
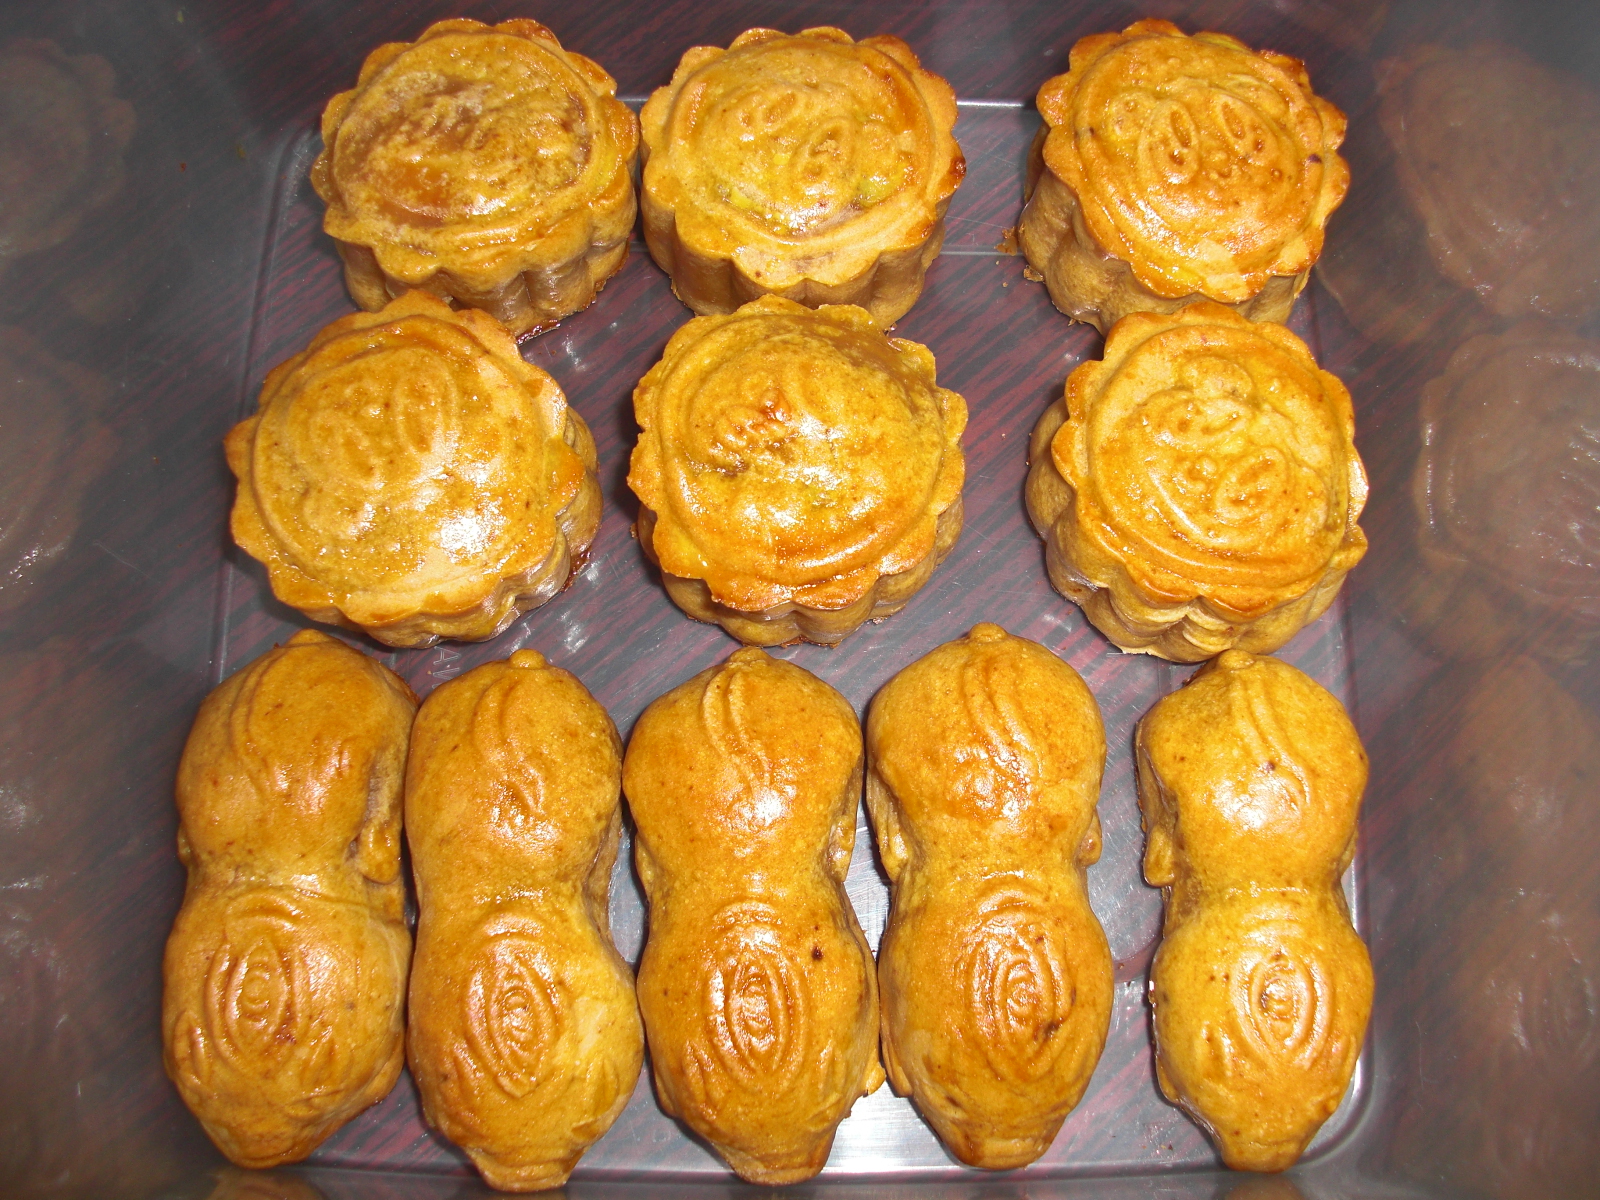
Lotus Seed Paste & Cheddar Cheese Mini Mooncake
I made some mini mooncakes instead of the big ones as I find the mini ones can retain its shape. When I made the bigger baked mooncake it became slanted and has 'elephant' feet. I think I need to trouble shoot some more before attempting again next year...:-((
I got this interesting recipe from the 'Yum Yum' magazine vol # 68. In this issue, they have many types of baked mooncake traditional and alsoteochew style. I picked this one since its the easiest...(^.^)
Skin:
175g Mooncake syrup / Golden syrup/Sugar syrup
1 tsp Alkaline Water
50g Peanut Oil (I used corn oil)
200-220g Low Protein Flour (I used superfine flour)
Filling:
250g Cheddar Cheese, cut into 25 cubes
350g Lotus seed paste, divided into 25 portions (14g each)
* You can actually reduce or add the portions of the cheddar cheese and lotus paste according to the weight of your mould.
Method:
1. Skin: Combine all ingredients & mix well. Cover with a piece of damp towel and rest for 30 mins. Divide the dough into 25 portions about 17g each.
2. Filling: Wrap 1 cube of cheddar cheese into 1 portion of lotus seed paste and form into a ball.
3. Flatten the skin dough, wrap filling and form into a ball. Sprinkle dough with a little flour and press into mooncake mould. Knock out the mooncake and place onto a baking tray. Brush off the excess flour.
4. Brush the surface with a little water and bake in preheatwed oven of 200 degree C for 8 mins. Remove and leave to cool for 15 mins. Glaze with beaten egg and bake for another 10 mins or until golden brown. Remove and leave to cool before serving.
I am submitting this post to Aspiring Bakers #11: Mid-Autumn Treats (September 2011), hosted by Happy Home Baking
I got this interesting recipe from the 'Yum Yum' magazine vol # 68. In this issue, they have many types of baked mooncake traditional and alsoteochew style. I picked this one since its the easiest...(^.^)
Skin:
175g Mooncake syrup / Golden syrup/Sugar syrup
1 tsp Alkaline Water
50g Peanut Oil (I used corn oil)
200-220g Low Protein Flour (I used superfine flour)
Filling:
250g Cheddar Cheese, cut into 25 cubes
350g Lotus seed paste, divided into 25 portions (14g each)
* You can actually reduce or add the portions of the cheddar cheese and lotus paste according to the weight of your mould.
Method:
1. Skin: Combine all ingredients & mix well. Cover with a piece of damp towel and rest for 30 mins. Divide the dough into 25 portions about 17g each.
2. Filling: Wrap 1 cube of cheddar cheese into 1 portion of lotus seed paste and form into a ball.
3. Flatten the skin dough, wrap filling and form into a ball. Sprinkle dough with a little flour and press into mooncake mould. Knock out the mooncake and place onto a baking tray. Brush off the excess flour.
4. Brush the surface with a little water and bake in preheatwed oven of 200 degree C for 8 mins. Remove and leave to cool for 15 mins. Glaze with beaten egg and bake for another 10 mins or until golden brown. Remove and leave to cool before serving.
I am submitting this post to Aspiring Bakers #11: Mid-Autumn Treats (September 2011), hosted by Happy Home Baking
Wednesday, September 14, 2011
Snow Skin Mooncake
Its the time of the year for mooncake baking & making. This year, instead of buying boxes of mooncake to give to friends and relatives, I gave them homemade mooncake..(^.^) and I'm so happy to get words of encouragement from hubby, relatives & friends. And also, the theme for this month's Aspiring Baker is 'Mid-Autumn Treats'.
For the snow skin mooncake, I made 4 types of flavour by adding emulco & coloring. I cant say I made the paste 100% as I used store bought ones and there were so many varieties of mooncake paste & fillings like peppermint, blueberry, charcoal, white coffee,etc.
Ingredients for Skin
100g Kao Fen
95g Icing Sugar
30g Shortening
120ml Cold water
Emulco/ Flavour/Paste
Coloring
1) Sift Kao Fen & icing sugar together.
2) Rub in shortening.
3) Add flavour & colour to cold water & pour into flour mixture.
4) Combine into dough and let rest for 30 mins.
5) Divide dough and wrap filling.
* I used Green Tea paste with Green Tea Lotus filling
Pink colouring with Dragon Fruit Paste
Yam Paste with Tausa filling
Durian Flavour & yellow colour with Durian Paste.
I am submitting this post to Aspiring Bakers #11: Mid-Autumn Treats (September 2011), hosted by Happy Home Baking
For the snow skin mooncake, I made 4 types of flavour by adding emulco & coloring. I cant say I made the paste 100% as I used store bought ones and there were so many varieties of mooncake paste & fillings like peppermint, blueberry, charcoal, white coffee,etc.
Ingredients for Skin
100g Kao Fen
95g Icing Sugar
30g Shortening
120ml Cold water
Emulco/ Flavour/Paste
Coloring
1) Sift Kao Fen & icing sugar together.
2) Rub in shortening.
3) Add flavour & colour to cold water & pour into flour mixture.
4) Combine into dough and let rest for 30 mins.
5) Divide dough and wrap filling.
* I used Green Tea paste with Green Tea Lotus filling
Pink colouring with Dragon Fruit Paste
Yam Paste with Tausa filling
Durian Flavour & yellow colour with Durian Paste.
I am submitting this post to Aspiring Bakers #11: Mid-Autumn Treats (September 2011), hosted by Happy Home Baking
Wednesday, August 31, 2011
Pineapple Cheese Pie
This recipe has been in my collection since last year but I have been keeping it aside as I did not attempt any pie baking last year. Since this month's (August) Aspiring Bakers Topic is 'Easy as Pie' I flipped through my cookbooks and magazines in search of interesting recipe and settled for this one.
It is quite easy to make and the tanginess of the pineapple filling combine with cream cheese sure taste delicious. This recipe is taken from the Y3K Recipe magazine issue #55.
I did not follow the recipe given for the pie crust as the measurement looked dubious to me. so I used my own favourite crust recipe.
Ingredients for Pastry:
1 cup flour
1/2 tsp salt
100g Shortening (I used butter)
1/4 cup cold water
- Sift flour & salt together. Rub in the shortening/butter. Slowly pour the cold water to form a dough. (you might not need to use all the water).
- Set aside in fridge for at least 30 mins before fitting in to a 9' pie dish.
Ingredients for Filling:
200g Pineapple Filling (available from local bakery store)
250g Cream Cheese
80g Castor Sugar
2 eggs, lightly beaten
1/4 tsp salt
60ml Milk
- Beat Cream Cheese until smooth. Add sugar. Slowly beat in eggs followed by salt and milk.
- Spread pineapple filling onto the prepared pie crust.
- Pour the Cream Cheese mixture on top.
- Bake in preheated oven of 170 degree C for 25 - 30 mins till golden brown.
I am submitting this to Aspiring Bakers #10: Easy As Pie ( August 2011) hosted by Janine of Not The Kitchen Sink!
It is quite easy to make and the tanginess of the pineapple filling combine with cream cheese sure taste delicious. This recipe is taken from the Y3K Recipe magazine issue #55.
I did not follow the recipe given for the pie crust as the measurement looked dubious to me. so I used my own favourite crust recipe.
Ingredients for Pastry:
1 cup flour
1/2 tsp salt
100g Shortening (I used butter)
1/4 cup cold water
- Sift flour & salt together. Rub in the shortening/butter. Slowly pour the cold water to form a dough. (you might not need to use all the water).
- Set aside in fridge for at least 30 mins before fitting in to a 9' pie dish.
Ingredients for Filling:
200g Pineapple Filling (available from local bakery store)
250g Cream Cheese
80g Castor Sugar
2 eggs, lightly beaten
1/4 tsp salt
60ml Milk
- Beat Cream Cheese until smooth. Add sugar. Slowly beat in eggs followed by salt and milk.
- Spread pineapple filling onto the prepared pie crust.
- Pour the Cream Cheese mixture on top.
- Bake in preheated oven of 170 degree C for 25 - 30 mins till golden brown.
I am submitting this to Aspiring Bakers #10: Easy As Pie ( August 2011) hosted by Janine of Not The Kitchen Sink!
Tuesday, August 23, 2011
Oreo Layer Cheesecake
CHEESECAKE again!!! My son was saying when he saw me taking out the cream cheese from the fridge. Son, this one is not the normal pure cheese cake, its a layer cake with cream cheese....(^.^) He was happy to try a slice after that. I really think my family has cheesecake phobia. Hmmm time to try other recipes..
I didnt get a spongy cake but the texture of the cheese was good and not dry. This recipe is taken from the book ' My Favourite Dainty Desserts' by Kevin Chai.
Sponge Cake Ingredients:
120g Sponge mix
2 Eggs
2 tbsp Water
30g Butter, melted
Filling:
400g Cream Cheese
100g Castore Sugar
2 Eggs
130g Sour Cream
1 tbsp Cornstarch
60g oreo Biscuits, crushed
1. To make sponge cake, beat sponge mix, eggs & water in a mixing bowl with high speed till light & fluffy.
Turn to low speed and add melted butter.
2. Spread into an 8' lined pan and bake at 180 degree C for 20 mins.
Cool and split to 2 layers.
3. To make filling, beat cream cheese and sugar until smooth. Beat in eggs one at a time until blended. Stir in sourcream and cornstarch.
4. Divide into 2 portions. Add in 40g oreo biscuits into a portion.
5. Place a slice of cake into pan. Spread the original flavour cheese batter and bake at 200 degree C for 20 mins.
6. Place another slice of cake on top of the half baked cheese. Spread with oreo cheese batter and sprinkle remaining crushed oreo biscuits on top. Return to oven to bake for another 20 mins.
7. Remove from oven and leave to cool. Chill in fridge.
I didnt get a spongy cake but the texture of the cheese was good and not dry. This recipe is taken from the book ' My Favourite Dainty Desserts' by Kevin Chai.
Sponge Cake Ingredients:
120g Sponge mix
2 Eggs
2 tbsp Water
30g Butter, melted
Filling:
400g Cream Cheese
100g Castore Sugar
2 Eggs
130g Sour Cream
1 tbsp Cornstarch
60g oreo Biscuits, crushed
1. To make sponge cake, beat sponge mix, eggs & water in a mixing bowl with high speed till light & fluffy.
Turn to low speed and add melted butter.
2. Spread into an 8' lined pan and bake at 180 degree C for 20 mins.
Cool and split to 2 layers.
3. To make filling, beat cream cheese and sugar until smooth. Beat in eggs one at a time until blended. Stir in sourcream and cornstarch.
4. Divide into 2 portions. Add in 40g oreo biscuits into a portion.
5. Place a slice of cake into pan. Spread the original flavour cheese batter and bake at 200 degree C for 20 mins.
6. Place another slice of cake on top of the half baked cheese. Spread with oreo cheese batter and sprinkle remaining crushed oreo biscuits on top. Return to oven to bake for another 20 mins.
7. Remove from oven and leave to cool. Chill in fridge.
Saturday, August 20, 2011
Martabak Mee ???
I think I've been blogging mostly on bakings although my blog says ' Cooking & Baking Journal'..(^.^) I was browsing through a page in Facebook and saw this recipe being posted by 'Sabah Cakes Directory' (whoever you are, thanks for this easy recipe).
The recipe sounded so interesting although there was no picture to accompany it. I think you can serve this as a snack or if you're bored of eating the normal instant noodle and would like to do something interesting to it, you can try this.
All you need is
1 pack of instant noodle (any brand)
2-3 eggs
some cooking oil
- Cook the instant noodle as you normally do and drain off the water.
- Mix with the accompanying seasoning.
- Add the eggs and mix together.
- Heat a little oil in your frying pan and spoon the noodles onto the pan.
- Flip over the other side and let it cook evenly.
- Serve hot!
Even though it is called 'Martabak Mee', I think its more of a Instant Noodle Omellette.. No matter how you call it, this is a delicious snack and you should try it out...
The recipe sounded so interesting although there was no picture to accompany it. I think you can serve this as a snack or if you're bored of eating the normal instant noodle and would like to do something interesting to it, you can try this.
All you need is
1 pack of instant noodle (any brand)
2-3 eggs
some cooking oil
- Cook the instant noodle as you normally do and drain off the water.
- Mix with the accompanying seasoning.
- Add the eggs and mix together.
- Heat a little oil in your frying pan and spoon the noodles onto the pan.
- Flip over the other side and let it cook evenly.
- Serve hot!
Even though it is called 'Martabak Mee', I think its more of a Instant Noodle Omellette.. No matter how you call it, this is a delicious snack and you should try it out...
Friday, August 19, 2011
Chilled 'Sunquick' Cheese Cake & Mango Pancake
I've been repeating previous recipes posted in this blog but gave a twist (variation) to it. Again, I made this chilled cheesecake just for the sake of using up the yogurt and this time, I used the 'Sunquick' mix fruit cordial instead of Ribena. You can actually use any cordial according to your preference.
The recipe can be viewed from http://xandrascookingbakingjournal.blogspot.com/2011/06/chilled-ribena-marble-cheesecake.html
As it is also the fruits season, the mango tree in my garden bore some fruits and to savour the sweet and juuicy fruit, I combined the flesh with whipped cream and wrapped them up with pancake.
The recipe can be obtained from http://xandrascookingbakingjournal.blogspot.com/2010/09/chilled-durian-pancake.html
The recipe can be viewed from http://xandrascookingbakingjournal.blogspot.com/2011/06/chilled-ribena-marble-cheesecake.html
As it is also the fruits season, the mango tree in my garden bore some fruits and to savour the sweet and juuicy fruit, I combined the flesh with whipped cream and wrapped them up with pancake.
The recipe can be obtained from http://xandrascookingbakingjournal.blogspot.com/2010/09/chilled-durian-pancake.html
Subscribe to:
Posts (Atom)