I've been hit by the Kasutera / Castella or better known as the Japanese Sponge Cake fever. My friend Cynthia of http://mumto4angels.blogspot.com/ started reviving the fever when she post it in her Facebook and everyone who knows how to bake started to bake this cake.
This cake uses 4 ingredients only -Flour, Sugar, Eggs & Honey. A good Kasutera is moist with a very fine texture and is very light. It does not have a speck of oil in it - no butter, margarine,or shortening.
Ingredients:
5 Egg Yolks
4 Egg whites
125g Castor Sugar
100g Bread Flour (I used High Protein flour)
15g Turbinado Sugar (I used Brown Sugar)
50g Honey + 2-3 tbsp hot water to dilute.
-Line insides & bottom of a 7" pan with foil & add a piece of parchment paper to bottom. Sprinkle with turbinado/brown sugar.
- Preheat ocen to 160 degree C.
- Whisk egg white on high speed & start adding castor sugar in 2-3 batches. Beat till firm peaks form.
- Add in yolks one at a time & mix on low speed till well combined.
- Add sifted flour & mix on low speed. Add honey + water & mix on low speed.
- Pour batter through a sieve onto cake pan. Tap pan on counter to remove bubbles.
- Bake 50 - 60 mins until golden brown on top.
- When ready, immediately take out and drop from a foot high to counter to prevent shrinkage.
- Cool and wrap with parchment paper/ cling film and store in fridge at least overnight.
- Trim sides before serving.
Thursday, March 15, 2012
Sunday, March 4, 2012
Boston Cream Cheesecake
While surfing the net for interesting recipes, I came upon this recipe from the kraft website. I've heard of Boston cream pie but not Boston Cream Cheesecake so I thought of giving it a try.
This recipe calls for premix yellow cake but I used my favorite butter cake recipe for the base. You can use sponge or butter cake for this.
Ingredients:
1 pkg (1 layer size) Yellow Cake Mix * may use your own butter/sponge cake recipe
750g Cream Cheese, room temperature
3/4 cup Castor Sugar
2 tsp Vanilla Essence, divided
3/4 cup Sour Cream
3 Eggs
2 squares bitter sweet Chocolate
3 tbsp Milk
2 tbsp Butter
1 cup icing Sugar, sifted
1) Grease a 9" springform pan. Prepare cake batter. Pour into pan and bake at 325 degree F for 25 mins. Cool.
2) Beat Cream Cheese, sugar & 1 tsp Vanilla Essence on medium speed.
3) Add sour cream, mix well. Add eggs one at a time, mixing on low speed. Pour cream cheese over cake layer. Bake at 325 degree F for 40 -45 mins or until center is almost set.
4) Run a knife around rim of pan to loosen pan. Cool before removing.
5) Place chocolate, milk & butter in medium bowl. Microwave on high for 2 mins till butter is melted. Stir after 1 min.
6) Add icing sugar & remaining vanilla essence. Mix well.
7) Spread over cooled cheesecake. Refrigerate 4 hours or overnight.
Sunday, February 5, 2012
Crunchy Durian Cookie
As promised, here is the 2nd 'new' cookie recipe that I made for the Chinese New Year. I was clearing up my room and at the same time flipping through my cooking books ( I didnt realised I accumulated so many cooking books) and found this interesting recipe. It's taken from 'Cakes Pastries Savouries' published by Bake with Yen Sdn Bhd. Guests who came to my CNY open house totally 'finished' them up and it was a pity I didnt bake enough... I will definitely make this cookie again for next years CNY if I manage to 'store' durians in my freezer.
Ingredients:
225g Butter
175g Icing Sugar
2 Egg Yolks
1 tsp Durian Essence
250g Plain Flour
30g Milk Powder
50g Custard Powder
1 tsp Baking Powder
100g Durians, mashed
some sesame seeds or almond nibs (for decoration)
Method:
1. Sift the plain flour, Milk powder, custard powder & baking powder together. Set aside
2. Cream butter & sugar till fluffy.
3. Add in egg yolks & durian essence.
4. Add in the sifted dry ingredients
5. Add in the mashed durian.
6. Pipe out with a noozle onto a baking tray and sprinkle sesame seeds or almond nibs on top.
7. Bake at 180 degree C for 25 mins or until golden brown.
Wednesday, February 1, 2012
Happy New Year 2012 & Gong Xi Fa Cai
Oh no!!! I've fallen behind in updating my blog again....:-(( The time flew past so quickly and before I realized it, it is already February 2012 . Hmmmm I actually did not attempt any new baking at end of 2011 as I had quite a number of orders from friends for the Christmas Celebration and then it was school opening time...Busy busy busy and Chinese New Year.
Before Chinese New Year arrived, I had planned to bake few types of cookies and all new recipes but with the last minute house cleaning (I actually used 3 whole days just to clean my Music Room which had became a 'store room' before attacking the kitchen) I just did not have the time to do any baking. And just 2 days before CNY Eve, I had a baking marathon and I had to use last year's recipe...:-(( BUT! I manage to bake 2 new flavour of cookies just the day before CNY Eve. I had all the ingredients at home and it looked interesting. It even had the word 'MUST TRY' printed on that page. One of the cookie is....: Butter Icing Cookie. This recipe is taken from the Yum Yum Magazine issue No 76.
Ingredients:
220g Butter
100g Castor Sugar
1 Egg
300g Plain Flour
Butter Icing:
30g Butter
70g Icing Sugar
Method:
1. Preheat oven to 160 degree C.
2.Butter Icing: Combine all ingredients and mix well. Place into a piping bag for later use.
3. Beat butter & castor sugar until creamy. Add in egg and beat until smooth. Add plain flour and mix into a dough.
4. Place into a piping bag and pipe onto a baking tray.
5. Use your fingers to indent the centre of the dough. Pipe a little of the butter icing into the indentation.
6. Bake cookies for 15-18 mins or until golden brown.
7. Remove fromn oven and leave to cool before storing.
Wednesday, December 21, 2011
Fish & Chips
I seldom post my cookings as I cant cook very well...:-)) I almost always use premix ingredients to cook meals for my family as I find it very tedious to prepare from scratch. There are a few dishes that my children love it when I cook for them and usually its western food. This is one of the dish that they love and will usually have 2nd servings..:-))
Ingredients
4 pcs dory fillets (pat dry)
Salt & Pepper
Oil for frying
Batter: 200g Plain flour
2 tsp baking powder
1/2 tsp salt
1/2 tsp pepper
4 tbsp oil
280 ml water
Extra: French fries
tartare sauce
Lemon Wedges
Method:
1. Season the dory fish with salt & pepper and set aside.
2. Mix all the batter ingredients together.
3. Heat plenty of oil in wok. Dip the fish fillet into the batter & fry till golden brown.
4. Serve fish with french fries and tartare sauce & lemon wedges by the side.
Monday, December 19, 2011
Red Cherry Baked Cheese Cake
Wow..another cheesecake recipe again....(^.^). I found that after baking so many cheesecake, they use more or less the same method but of course the texture varies on what ingredients are used. Some use purely cream cheese and you get this dense and creamy texture while some mix in whipped cream and you get this fluffy texture.
For this Red Cherry Cheesecake, I got this recipe when I went to attend the 'Anchor' products cooking demo in my local bakery shop and decided to try it out after sampling the cake during the demo.
Ingredients:
Base:
100g Digestive Biscuit, crushed
50g Butter, melted
Filling:
375g Cream Cheese
115g Castor sugar
100g Sour Cream or plain yogurt
3 Eggs
200g Whipping Cream, whipped
2 tbsp Cornflour
Red Cherry filling (from tin)
1) Base: Mix the crushed biscuit & melted butter together & press onto the base of a 9" springform pan. Set aside.
2) Beat cream cheese & sugar together till light.
3) Add in eggs one at a time.
4) Add in the sour cream & cornflour.
5) Fold in the whipped whipping cream.
6) Put few tbsp of red cherry filling on the biscuit base and pour the cream cheese mixture over. Top with few tbsp cherry filling.
7) Steam bake at 160 degree C for 1 hr 30 mins.
8) Refrigerate overnight before removing from tin.
Saturday, December 17, 2011
Ooops! I did it again!
Ha..ha.. From the title, no, I'm not refering to Britney Spears song but rather on my neglected blog....Really, I do not know where the time went. It was a busy month for me in November because it was the end of the school year and also my daughter was facing her SPM examination. I did manage to do some baking and I will upload them one by one as soon as possible.
For this post, as promised previously, I'm giving you the recipe I used for making macarons. One thing I discovered when making macarons is that on a rainy day, the humidity is very high and the success of having a good macaron is slim. It was a waste of ingredients and time. Nevertheles, my macarons still have those 'feets' except that they are not as high as I want them to be nor are they dry on the inside.
110g Ground Almond
200g Icing Sugar
90g Egg Whites (best to age them overnight)
50g Castor Sugar
1) Sift ground almond & icing sugar together.
2) Beat egg whites till frothy, add castor sugar & beat till stiff peak. You may add some colouring at this point.
3) Add meringue to almond mixture. Carefully fold in till you get a sticky consistency. Do not overfold till its runny.
4) Pipe onto tray lined with parchment paper.
5) Bake at 130 degree C for 18 - 20 mins.
6) Match the macaron shells and fill it with buttercream or chocolate ganache.
Saturday, October 29, 2011
My Battle with D Mac....
OK. This post I'm not giving out any recipes but rather share with my readers on my battle with the Mac. Not McDonald but rather the Macarons....
The confectionery is characterized by its smooth, domed top, ruffled circumference (referred to as the "foot"), and flat base. It is mildly moist and easily melts in the mouth.
Then again, do not be confused by 'macaroons'. A macaroon is a type of light, baked confection, described as either small cakes or meringue-like cookies depending on their consistency. The original macaroon was a "small sweet cake consisting largely of ground almond similar to Italian or Moroccan amaretti.
I think anybody who has attempted to bake macarons must have tried few times before succeed (except for few lucky ones who managed in 1 attempt.) For me, I think nobody has my record of more than 15 attempts. Some were edible and some went into the bin. I did manage to take some shots of the first few tries and after that I gave up.
It wasnt until my friend, Cynthia of http://mumto4angels.blogspot.com/ started to bake them that my interest to try this cute & colourful french 'cookie' once again. With help and some troubleshooting from my bro, Moses who came home for a short break from US that I managed to bake the macaron. With daily practice, I managed to master the art of baking macarons!!! Yay!!!!
Here's some pix of my first few disasters..(Pls dont laugh...:-((
This one was more like a meringue.....
I added some ground hazelnut to make 'Hazelnut Chocolate Macaron'
Assorted Macarons packed into a box as gift
A 'macaron' is a sweet confectionery made with egg whites, icing sugar, granulated sugar, almond powder or ground almond, and food coloring. The macaron is commonly filled with buttercream or jam filling sandwiched between two cookies. Its name is derived from an Italian word "maccarone" or "maccherone". This word is itself derived from ammaccare, meaning crush or beat, used here in reference to the almond paste which is the principal ingredient. It is meringue-based: made from a mixture of egg whites, almond flour.
The confectionery is characterized by its smooth, domed top, ruffled circumference (referred to as the "foot"), and flat base. It is mildly moist and easily melts in the mouth.
Then again, do not be confused by 'macaroons'. A macaroon is a type of light, baked confection, described as either small cakes or meringue-like cookies depending on their consistency. The original macaroon was a "small sweet cake consisting largely of ground almond similar to Italian or Moroccan amaretti.
I think anybody who has attempted to bake macarons must have tried few times before succeed (except for few lucky ones who managed in 1 attempt.) For me, I think nobody has my record of more than 15 attempts. Some were edible and some went into the bin. I did manage to take some shots of the first few tries and after that I gave up.
It wasnt until my friend, Cynthia of http://mumto4angels.blogspot.com/ started to bake them that my interest to try this cute & colourful french 'cookie' once again. With help and some troubleshooting from my bro, Moses who came home for a short break from US that I managed to bake the macaron. With daily practice, I managed to master the art of baking macarons!!! Yay!!!!
Here's some pix of my first few disasters..(Pls dont laugh...:-((
This one was more like a meringue.....
![]() |
| Perhaps the temperature was too hot, it cracked... |
Tried to add some 'sprinkles' to make it more attractive...
Thought this mac was going to have the 'feet' but....it didnt happen...:-((
And now....my successful macarons...(^.^)...
This one is with Green Tea Buttercream Filling
Assorted Macarons packed into a box as gift
Or make it into Macaron Lolipop...
And I can only say that the battle has been won!!!! Will post some more pix and my recipe for the macarons...
Tuesday, October 18, 2011
Cranberry Pecan Cookies
I have been diverting away from baking Cakes & Cheesecakes these few days so, another type that I seldom make is ...Cookies which I would make only during festive season like Chinese New Year. Last month, a customer gave me a box of Cranberry Pecan Cookie made by her sister. My family loved the cookies so much that it was all gone in 2 days time after I opened it.
I was a little hesitant to get the recipe from her sister as we're not so acquanted, I googled the web for a cranberry recipe and found this one that looks easy and interesting as it had chocolate chips added. This recipe is taken from the web cooks.com
I would suggest to make smaller pieces so it will be crispier. The crunchyness of the pecan nuts and chewiness of the cranberries plus the chocolate chips given by my brother from US makes the cookies taste soooo good. I would definitely make this for Chinese New Year.....:-))
Ingredients:
125g Butter
1 Egg
1 tsp Vanilla Essence
1 1/4 cups Flour
1/2 tsp Baking Soda
1/2 tsp Salt
1/3 cup Brown Sugar
1/3 cup Castor Sugar
3/4 cup Dried Cranberries (chopped to small pieces)
1/2 cup Chopped Pecan Nuts
1/2 cup Chocolate Chips
1) Preheat oven to 375 degree F.
2) Beat butter, egg & vanilla till fluffy.
3) Add remaining ingredients and mix by hand till well blended.
4) Drop heaoing teaspoonful of mixture to cookie sheet.
5) Bake for 8 -10 mins or till edges slightly brown.
(Before Baking)
(After Baked)
Saturday, October 15, 2011
Kueh Keria
Hmmmm I seldom make traditional kuehs but I love to eat them. If I go to the morning market, there sure will be lots of varieties and I go 'gaga' over them and ended up buying lots of them. Alas, my family is not an avid fan of kuehs so rather than go to waste, the kuehs will be my breakfast, lunch, tea break sometimes thrown into the bin as some of the kueh has coconut milk and it will go bad towards the evening.
As this month (October) Aspiring Bakers theme is Traditional Kueh, I gave this recipe a try. I remembered making this when I just got married and stayed together with my in-laws. They always have lots of sweet potatoes/ tapiocas as we stayed in a kampung and they plant fruits and rear pigs, chickens, geese, etc - A typical kampung life. My sis-in-law always made them into keropok (crackers) and while I made kueh keria out of it. I never measured the ingredients used so for my fellow readers, I try to give the weight of the ingredients.
(This one is before glazing)
Ingredients:
600g Sweet Potatoes
60g Plain Flour
60g Tapioca Flour
120g Castor sugar
45ml water
Oil for deep frying
1. Boil sweet potatoes till tender. Peel the skin and mash till fine.
2. Add flour little by little to the mashed potatoes & knead together to form a dough. Add water if its too dry.
3. Roll dough on a floured surface to 5 cm thick. Use a donut cutter to cut.
4. Heat oil in wok & deep fry the kueh. Drain & set aside.
5. Put sugar & water in a pan to make a thick syrup. Add the kueh to pan and glaze completely.
(This was after the glaze but I realised I didnt wait until the sugar syrup crystalized a little before dipping the kueh in. It would have been much nicer...:-))
I am submitting this post to Aspiring Bakers #12: Traditional Kueh (October 2011) hosted by Small Small Baker.
Thursday, October 13, 2011
Orange Baked Cheesecake
My daughter was telling me the other day that I have not been baking Chocolate cake for quite sometime. My daughter is a chocolate lover so I obliged her request but was just too lazy to try a chocolate ganache cake for her. Since she loves cheesecake as well, I made this Baked Cheesecake for her temporary...:-)) and promise to bake her a chocolaty chocolate cake for her birthday in December..(^.^)
This recipe is taken from 'Alex Goh's Baking Code. I find that his recipe is quite reliable and easy. I hope to meet him in person or attend his class one day...
Prepare a 23 cm Chocolate sponge cake about 2 cm thick. You can use any sponge cake recipe that you like or if you're lazy like I did, use a sponge mix..:-))
Ingredients A:
250g Cream Cheese
20g Castor Sugar
1 Orange Zest
Ingredients B:
3 Egg Yolk
Ingredients C:
30g Orange Juice
80g Sour Cream (I used Natural Yogurt)
Ingredients D:
25g Plain Flour
Ingredients E:
3 Egg White
55g Castor Sugar
1. Grease & line the sides & bottom of a 23cm round mould. Wrap the outside with aluminium foil.
2. Cream ingredients A until light. Add in ingredients B, cream until smooth.
3. Add in ingredients C, cream until well blended. Add in ingredients D, mix until incorporated.
4. Whip ingredients E until soft peak stage.
5. Mix the whipped egg white with the above cheese mixture until well incorporated.
6. Place a layer of sponge at the bottom of the mould. Pour the cheese mixture over the cake.
7. Bake in water bath at 160 degree C for 1 hour.
Tuesday, October 4, 2011
Durian Cheesecake
I had some durian flesh frozen in my freezer and decided to use it up so I dug out my collection of recipe books in search for interesting recipe that calls for durian and found this. I made a chilled durian cheesecake last year but didnt find it appealing so I thought of giving this baked durian cheesecake a try.
This recipe is taken from the book 'Baking Code' by Alex Goh. I found the texture to be quite dense initially but after overnight in the fridge, it was much better. The aroma of the durian cannot be described...:-))
Ingredients A:
150g Milk
60g Durian Paste (I used durian flesh)
30g Butter
Ingredients B:
125g Cream Cheese
Ingredients C:
30g Plain Flour
20g Corn Flour
Ingredients D:
2 egg Yolk
1 tsp Vanilla Essence
Ingredients E:
2 egg White
1/8 tsp Cream of Tartar
60g Sugar
1. Grease & line bottom of a 18 cm round mould.
2. Cook Ingredients A until it boils. Cream Ingredients B until smooth. Add in Ingredients A, mix until well blended. Place over double boiler, stir until thick. Remove form double boiler.
3. Add in Ingredients C, mix until well combined. Add in Ingredients D, mix until evenly blended.
4. Whip the egg white in Ingredients E until foamy. Add in the remaining ingredients, continue to whip until soft peak stage. Add it into the above cheese mixture, mix until incorporated.
5. Pour the cheese mixture onto the prepared mould.
6. Bake in water bath at 160 degree C for 50 -60 mins or until set & golden brown.
7. Remove cake from the mould immediately when baked. Set aside to cool.
Sunday, September 25, 2011
My brother's Wedding cake
Today I will not be posting new recipes, instead I will post pix of my brother's wedding cake...(^.^). My brother who works in Singapore decided to have a sunset wedding with his wife at his hometown, Kota Kinabalu, Sabah and his wife ( my sis-in-law) requested for me & my USA brother's help to bake their wedding cake. BTW, my USA brother is my youngest brother and not the groom...:-))
I left all the planning to my brother as he has more experience and I just assisted him in the baking. He and my sis-in-law decided on a 3 tier 'satelite' wedding cake design and my sis-in-law requested for green tea flavour. Well, my USA brother flew in on 31st Aug 2011 and the next day we started buying all ingredients to prepare for the wedding cake. Wow! I have never bought so much cake ingredient especially the icing sugar. All in all I bought 30kgs to make the buttercream icing and also the fondant (but we didnt use up all of the sugar).
I baked the butter cake using my favourite recipe. I had to bake 14 pcs of cake to make seven 6" cake , 2 pcs of 8" cake and 3 pcs of 12" cake. I also made lots and lots of fondant. My brother in the mean time, prepared all the fillings which is Lemon Buttercream, Red Bean paste & Green Tea Buttercream.
Oh yes, we were also supposed to make Lollipop Macarons to serve to the guests as pre-dinner snacks. I told my brother that I havent have any success on making macarons and left the job to him...:-)) Initially, he had failures due to the high humidity in our place and after some trouble shooting we managed to get some nice ones & some bad ones.
Here are some of the pix of the wedding cakes...
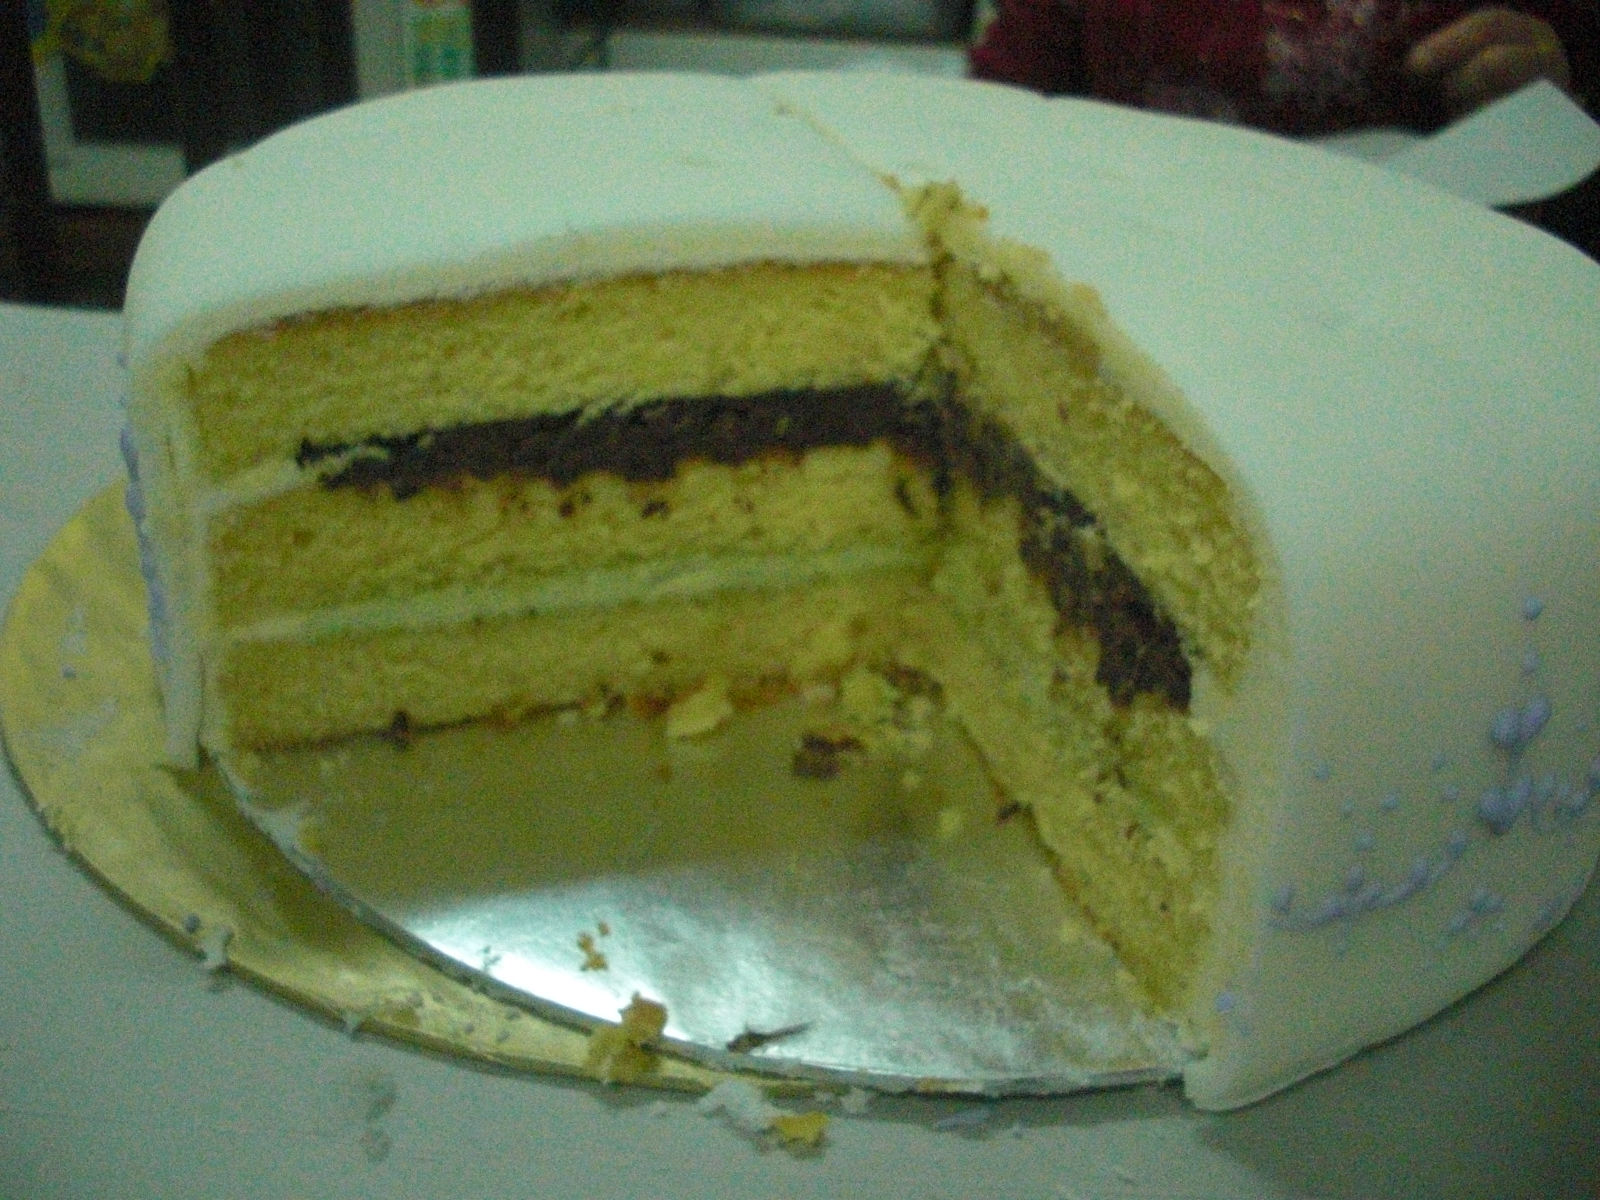
The butter cake all covered with fondant.
My sis-in-law (the bride) wanted a contemporary design on the cake. Initially, we were supposed to use a stencil but it didnt work out as the icing got smeared so my brother had to use 'free hand' to pipe the design..(I would not have been able to do it...:-)
Tadah!! The completed wedding cake assembled at the wedding dinner reception. (Cakes & fondant made by me, fillings & decoration by my US brother)
My Spore brother & sis-in-law scout around Spore & Johore for a wedding topper but couldnt find one that they like so my USA brother offered to buy for them from USA and they chosed this one..
The 7 pcs of 6" cake which is the bottom 'satelite' tier is sandwiched with lemon buttercream. As there were 7 tables, each table had a whole cake served to them.
The 8" and 12" cake are sandwiched with Red Bean paste and Green Tea buttercream. We divide the 12 " cake amongst family members and the 8" cake was kept frozen for the bride & groom's 1st year anniversary. (The cake is still in my freezer as they couldnt bring it back to Spore (excess luggage) and furthermore they plan to celebrate their 1st anniversary in KK, Sabah. (I have to ensure no 2 legged rat eat them up...:-))
And last but not the least, the Lollipop macaron made by my brother packed nicley for the guests.
I left all the planning to my brother as he has more experience and I just assisted him in the baking. He and my sis-in-law decided on a 3 tier 'satelite' wedding cake design and my sis-in-law requested for green tea flavour. Well, my USA brother flew in on 31st Aug 2011 and the next day we started buying all ingredients to prepare for the wedding cake. Wow! I have never bought so much cake ingredient especially the icing sugar. All in all I bought 30kgs to make the buttercream icing and also the fondant (but we didnt use up all of the sugar).
I baked the butter cake using my favourite recipe. I had to bake 14 pcs of cake to make seven 6" cake , 2 pcs of 8" cake and 3 pcs of 12" cake. I also made lots and lots of fondant. My brother in the mean time, prepared all the fillings which is Lemon Buttercream, Red Bean paste & Green Tea Buttercream.
Oh yes, we were also supposed to make Lollipop Macarons to serve to the guests as pre-dinner snacks. I told my brother that I havent have any success on making macarons and left the job to him...:-)) Initially, he had failures due to the high humidity in our place and after some trouble shooting we managed to get some nice ones & some bad ones.
Here are some of the pix of the wedding cakes...
The butter cake all covered with fondant.
My sis-in-law (the bride) wanted a contemporary design on the cake. Initially, we were supposed to use a stencil but it didnt work out as the icing got smeared so my brother had to use 'free hand' to pipe the design..(I would not have been able to do it...:-)
Tadah!! The completed wedding cake assembled at the wedding dinner reception. (Cakes & fondant made by me, fillings & decoration by my US brother)
My Spore brother & sis-in-law scout around Spore & Johore for a wedding topper but couldnt find one that they like so my USA brother offered to buy for them from USA and they chosed this one..
The 7 pcs of 6" cake which is the bottom 'satelite' tier is sandwiched with lemon buttercream. As there were 7 tables, each table had a whole cake served to them.
The 8" and 12" cake are sandwiched with Red Bean paste and Green Tea buttercream. We divide the 12 " cake amongst family members and the 8" cake was kept frozen for the bride & groom's 1st year anniversary. (The cake is still in my freezer as they couldnt bring it back to Spore (excess luggage) and furthermore they plan to celebrate their 1st anniversary in KK, Sabah. (I have to ensure no 2 legged rat eat them up...:-))
And last but not the least, the Lollipop macaron made by my brother packed nicley for the guests.
Saturday, September 17, 2011
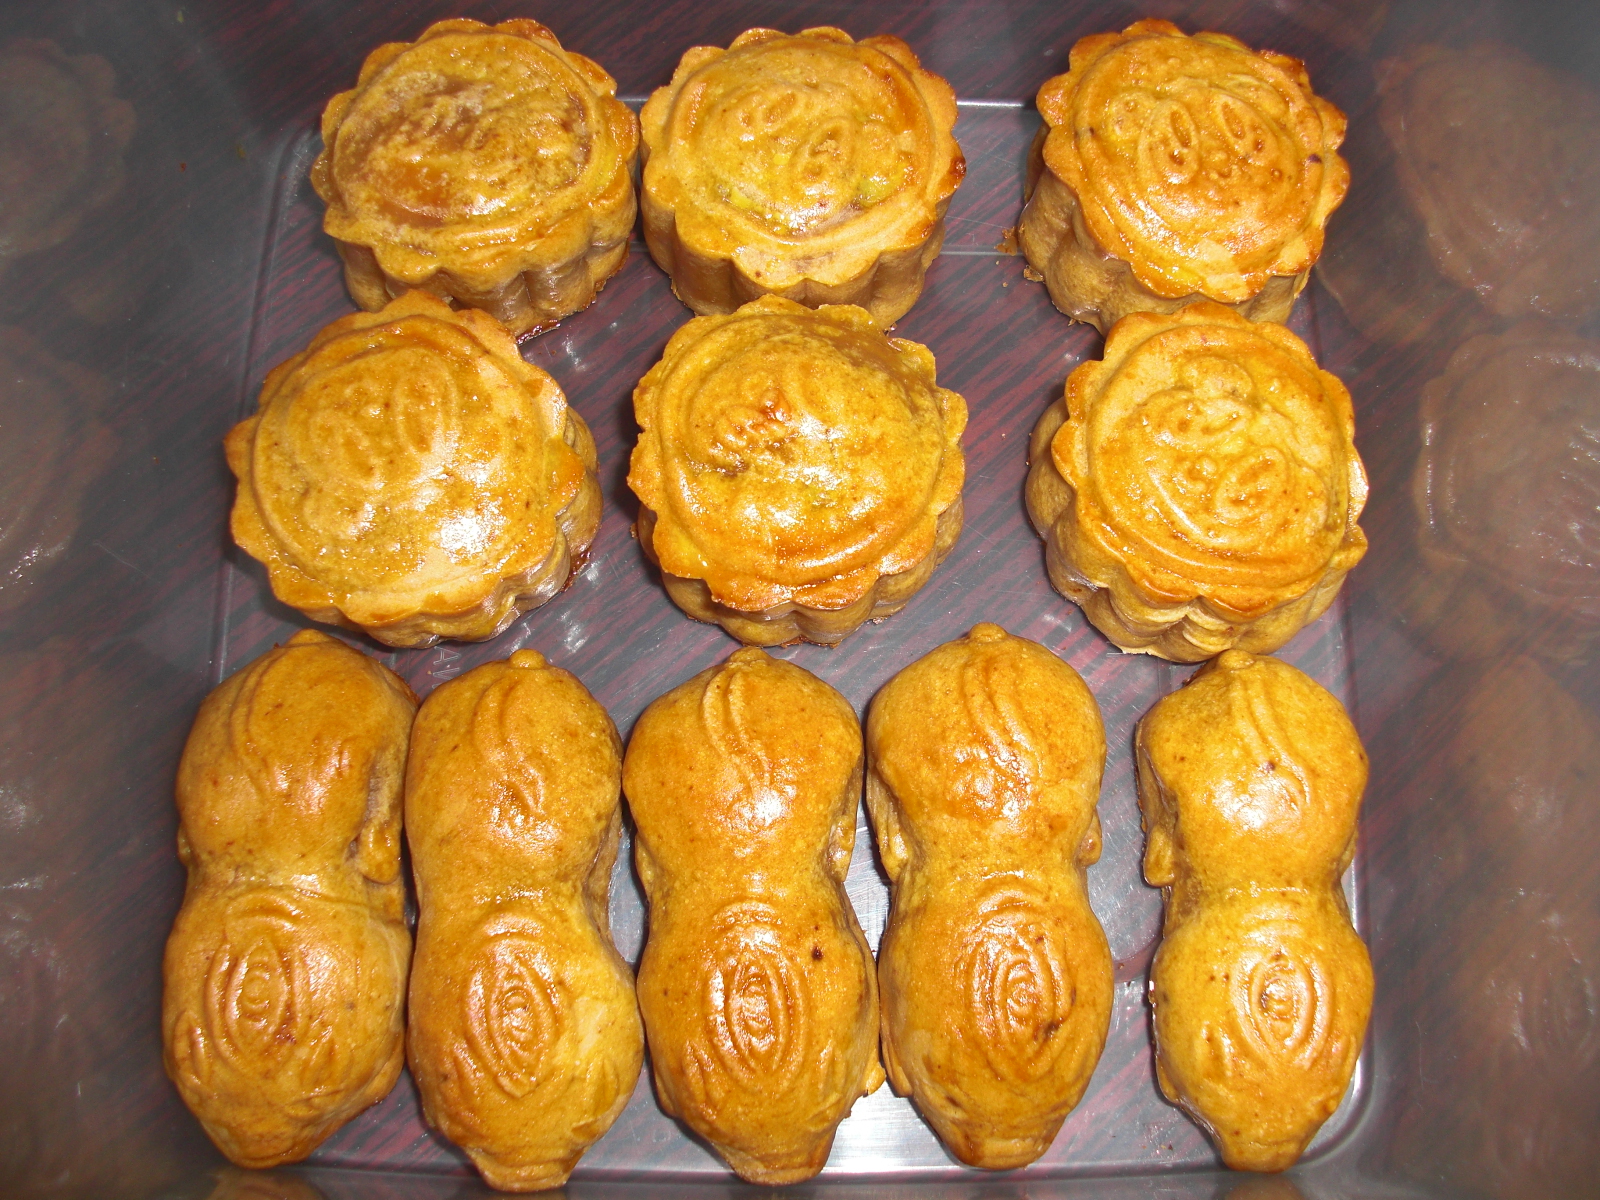
Lotus Seed Paste & Cheddar Cheese Mini Mooncake
I made some mini mooncakes instead of the big ones as I find the mini ones can retain its shape. When I made the bigger baked mooncake it became slanted and has 'elephant' feet. I think I need to trouble shoot some more before attempting again next year...:-((
I got this interesting recipe from the 'Yum Yum' magazine vol # 68. In this issue, they have many types of baked mooncake traditional and alsoteochew style. I picked this one since its the easiest...(^.^)
Skin:
175g Mooncake syrup / Golden syrup/Sugar syrup
1 tsp Alkaline Water
50g Peanut Oil (I used corn oil)
200-220g Low Protein Flour (I used superfine flour)
Filling:
250g Cheddar Cheese, cut into 25 cubes
350g Lotus seed paste, divided into 25 portions (14g each)
* You can actually reduce or add the portions of the cheddar cheese and lotus paste according to the weight of your mould.
Method:
1. Skin: Combine all ingredients & mix well. Cover with a piece of damp towel and rest for 30 mins. Divide the dough into 25 portions about 17g each.
2. Filling: Wrap 1 cube of cheddar cheese into 1 portion of lotus seed paste and form into a ball.
3. Flatten the skin dough, wrap filling and form into a ball. Sprinkle dough with a little flour and press into mooncake mould. Knock out the mooncake and place onto a baking tray. Brush off the excess flour.
4. Brush the surface with a little water and bake in preheatwed oven of 200 degree C for 8 mins. Remove and leave to cool for 15 mins. Glaze with beaten egg and bake for another 10 mins or until golden brown. Remove and leave to cool before serving.
I am submitting this post to Aspiring Bakers #11: Mid-Autumn Treats (September 2011), hosted by Happy Home Baking
Wednesday, September 14, 2011
Snow Skin Mooncake
Its the time of the year for mooncake baking & making. This year, instead of buying boxes of mooncake to give to friends and relatives, I gave them homemade mooncake..(^.^) and I'm so happy to get words of encouragement from hubby, relatives & friends. And also, the theme for this month's Aspiring Baker is 'Mid-Autumn Treats'.
For the snow skin mooncake, I made 4 types of flavour by adding emulco & coloring. I cant say I made the paste 100% as I used store bought ones and there were so many varieties of mooncake paste & fillings like peppermint, blueberry, charcoal, white coffee,etc.
Ingredients for Skin
100g Kao Fen
95g Icing Sugar
30g Shortening
120ml Cold water
Emulco/ Flavour/Paste
Coloring
1) Sift Kao Fen & icing sugar together.
2) Rub in shortening.
3) Add flavour & colour to cold water & pour into flour mixture.
4) Combine into dough and let rest for 30 mins.
5) Divide dough and wrap filling.
* I used Green Tea paste with Green Tea Lotus filling
Pink colouring with Dragon Fruit Paste
Yam Paste with Tausa filling
Durian Flavour & yellow colour with Durian Paste.
I am submitting this post to Aspiring Bakers #11: Mid-Autumn Treats (September 2011), hosted by Happy Home Baking
Wednesday, August 31, 2011
Pineapple Cheese Pie
This recipe has been in my collection since last year but I have been keeping it aside as I did not attempt any pie baking last year. Since this month's (August) Aspiring Bakers Topic is 'Easy as Pie' I flipped through my cookbooks and magazines in search of interesting recipe and settled for this one.
It is quite easy to make and the tanginess of the pineapple filling combine with cream cheese sure taste delicious. This recipe is taken from the Y3K Recipe magazine issue #55.
I did not follow the recipe given for the pie crust as the measurement looked dubious to me. so I used my own favourite crust recipe.
Ingredients for Pastry:
1 cup flour
1/2 tsp salt
100g Shortening (I used butter)
1/4 cup cold water
- Sift flour & salt together. Rub in the shortening/butter. Slowly pour the cold water to form a dough. (you might not need to use all the water).
- Set aside in fridge for at least 30 mins before fitting in to a 9' pie dish.
Ingredients for Filling:
200g Pineapple Filling (available from local bakery store)
250g Cream Cheese
80g Castor Sugar
2 eggs, lightly beaten
1/4 tsp salt
60ml Milk
- Beat Cream Cheese until smooth. Add sugar. Slowly beat in eggs followed by salt and milk.
- Spread pineapple filling onto the prepared pie crust.
- Pour the Cream Cheese mixture on top.
- Bake in preheated oven of 170 degree C for 25 - 30 mins till golden brown.
I am submitting this to Aspiring Bakers #10: Easy As Pie ( August 2011) hosted by Janine of Not The Kitchen Sink!
Tuesday, August 23, 2011
Oreo Layer Cheesecake
CHEESECAKE again!!! My son was saying when he saw me taking out the cream cheese from the fridge. Son, this one is not the normal pure cheese cake, its a layer cake with cream cheese....(^.^) He was happy to try a slice after that. I really think my family has cheesecake phobia. Hmmm time to try other recipes..
I didnt get a spongy cake but the texture of the cheese was good and not dry. This recipe is taken from the book ' My Favourite Dainty Desserts' by Kevin Chai.
Sponge Cake Ingredients:
120g Sponge mix
2 Eggs
2 tbsp Water
30g Butter, melted
Filling:
400g Cream Cheese
100g Castore Sugar
2 Eggs
130g Sour Cream
1 tbsp Cornstarch
60g oreo Biscuits, crushed
1. To make sponge cake, beat sponge mix, eggs & water in a mixing bowl with high speed till light & fluffy.
Turn to low speed and add melted butter.
2. Spread into an 8' lined pan and bake at 180 degree C for 20 mins.
Cool and split to 2 layers.
3. To make filling, beat cream cheese and sugar until smooth. Beat in eggs one at a time until blended. Stir in sourcream and cornstarch.
4. Divide into 2 portions. Add in 40g oreo biscuits into a portion.
5. Place a slice of cake into pan. Spread the original flavour cheese batter and bake at 200 degree C for 20 mins.
6. Place another slice of cake on top of the half baked cheese. Spread with oreo cheese batter and sprinkle remaining crushed oreo biscuits on top. Return to oven to bake for another 20 mins.
7. Remove from oven and leave to cool. Chill in fridge.
Saturday, August 20, 2011
Martabak Mee ???
I think I've been blogging mostly on bakings although my blog says ' Cooking & Baking Journal'..(^.^) I was browsing through a page in Facebook and saw this recipe being posted by 'Sabah Cakes Directory' (whoever you are, thanks for this easy recipe).
The recipe sounded so interesting although there was no picture to accompany it. I think you can serve this as a snack or if you're bored of eating the normal instant noodle and would like to do something interesting to it, you can try this.
All you need is
1 pack of instant noodle (any brand)
2-3 eggs
some cooking oil
- Cook the instant noodle as you normally do and drain off the water.
- Mix with the accompanying seasoning.
- Add the eggs and mix together.
- Heat a little oil in your frying pan and spoon the noodles onto the pan.
- Flip over the other side and let it cook evenly.
- Serve hot!
Even though it is called 'Martabak Mee', I think its more of a Instant Noodle Omellette.. No matter how you call it, this is a delicious snack and you should try it out...
Friday, August 19, 2011
Chilled 'Sunquick' Cheese Cake & Mango Pancake
I've been repeating previous recipes posted in this blog but gave a twist (variation) to it. Again, I made this chilled cheesecake just for the sake of using up the yogurt and this time, I used the 'Sunquick' mix fruit cordial instead of Ribena. You can actually use any cordial according to your preference.
The recipe can be viewed from http://xandrascookingbakingjournal.blogspot.com/2011/06/chilled-ribena-marble-cheesecake.html
As it is also the fruits season, the mango tree in my garden bore some fruits and to savour the sweet and juuicy fruit, I combined the flesh with whipped cream and wrapped them up with pancake.
The recipe can be obtained from http://xandrascookingbakingjournal.blogspot.com/2010/09/chilled-durian-pancake.html
Subscribe to:
Posts (Atom)


